,fit(cover),quality(100)/https%3A%2F%2Ftrackercdn.com%2Fghost%2Fimages%2F2021%2F5%2F24642_Header.jpg/image.jpg)
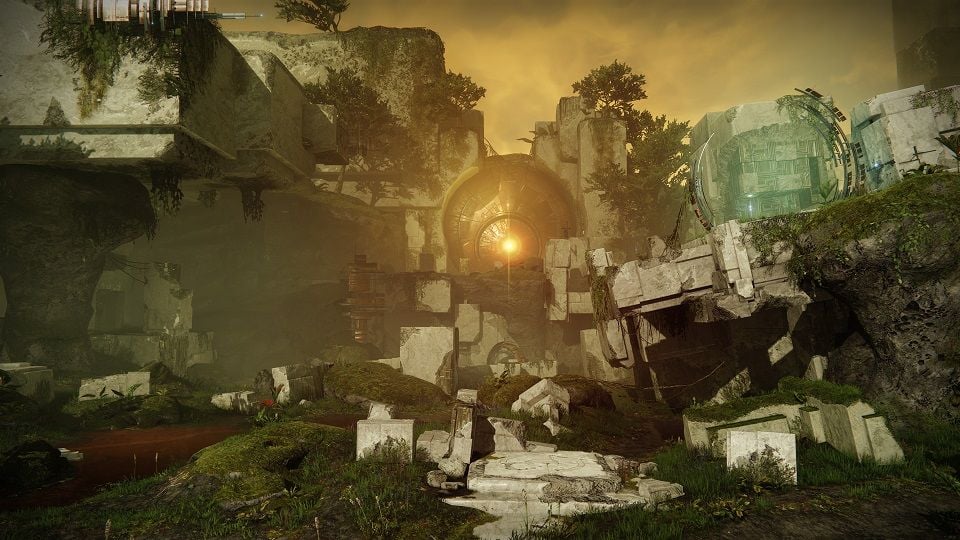
Destiny’s inaugural Raid ‘The Vault of Glass’ has returned to the franchise as part of the Season of the Splicer and many Guardians have been venturing into the Vault to uncover its secret and plunder its loot.
For the first 24 hours after the release of the Raid the Contest mode was active. This mode caps Guardians Power level so that the World’s First race can be a fair competition. Since this made the Raid a fair bit harder, it then meant that an early completion of the Raid would be out of reach for more casual players.
Now that Contest mode has ended, players are able to bring their full might into the Vault and a completion of the Raid has become more a possibility for a larger portion of the community.
Below is a simple guide for the different encounters within the Vault of Glass, as well as the locations of the secret chests, and the loot that can be earned from each encounter:
Encounter 1 - Forming the Spire
Once you load into the Raid you will find your Fireteam in the Ishtar Sink on Venus, right in front of the Vault doors.
From here the Fireteam will need to split up into three teams of two, one team heading to the lower left, one to the middle in front of the Vault, and one to the upper right. In each of these locations there will be a Vex plate in which a player must stand to ‘capture’ the plate. You will know when it's fully captured when a small white barrier has formed around the edges and there is a quick flash of white light.
Once all three plates have been captured a Spire will begin to form in the centre of the area and once fully formed will fire a laser at the Vault door to open it. While this Spire is forming though your Fireteam will be constantly assaulted by Vex enemies from multiple angles. You must kill these Vex before they reach any of the captured plates as if they step inside the white barriers, they will begin to capture the plates themselves and reverse the progress of the Spire formation.
Watch out for the Cyclopes that will spawn towards the centre of the area as these can easily one-shot you from great distances. Prioritise killing these over all other enemies, unless one is capturing a plate.
Some loadout suggestions for this encounter would be that each member in the team of two has a medium range Primary weapon to take out the Vex Goblins. One member should have a long range weapon to take out the Cyclopes, while the other member should have a short range weapon to quickly take out any enemies that make it too close to the plates.
This encounter is fairly simple and it is just a simple wave defense mechanic. Make sure to call out Cyclopes to your team, focus on any enemies getting too close to the plates, and you would clear this encounter fairly quickly.
Once the Vault has opened you may proceed into the main entrance and open to the chest inside on the left. This will reward some Spoils of War and possibly some Vault of Glass Armor Mods.
Secret Chest 1
When proceeding into the Vault you will soon come across an open chasm in front of you, with the way to the next encounter heading to the left. You can actually jump down into the chasm and there will be a small hole in the wall under the platform you just jumped off. Simply follow this pathway down along the numerous platforms and you will eventually come across another chest. This will reward similar loot to the first chest past the Vault door. Once the chest has been looted, continue along this same pathway to reach the Templar’s Well.
Encounter 2 - Confluxes
In this area you will find yourself on a platform overlooking a large arena. Make yourself comfortable and scope out the area, you will be spending a fair bit of time here as the next three encounters all take place here.
Once you jump down into the arena, the Templar boss, a large Hydra, will spawn ahead and the encounter will begin. A Vex Conflux will spawn towards the centre of the arena which the Fireteam will need to defend from enemies spawning to the left, right and in front. Have your team spread out along the centre of the arena to form a line of defence for these enemies to avoid any of them sacrificing themselves to the Confluxes.
After defending this Conflux for a time it will disappear and two more Confluxes will spawn on the right and left of the arena. Split up into two teams of three to defend each of the Confluxes and simply do the same as you did before.
Be careful of the Major Wyverns that will spawn in this encounter as not only are they tough enemies, but when they die they will create a pool of liquid that when stepped into gives the ‘Marked for Negation’ debuff. Throughout this encounter, the Templar boss will cast a ‘Ritual of Negation’ attack that will instantly kill any Guardians that have the ‘Marked for Negation’ debuff. Don't panic if you become marked as there is a fairly simple way to cleanse yourself of this debuff. In front of the Templar, in the centre of the arena, is a glowing pool of light that when stepped into, removes the ‘Marked for Negation’ debuff. The Fanatics that spawn in at the end of each phase also drop this same liquid that will give the ‘Marked for Negation’ debuff.
Once the two Confluxes have been successfully defended, a third will appear in the centre again and this time all three will need to be defended at the same time.
Witherhoard and Salvager’s Salvo are great weapons to have here as they can easily kill an entire wave of spawning Vex Goblins. High damage Heavy weapons such as a Sword, Rocket Launcher or Heavy Grenade Launcher are also crucial to have in order to take out the Wyverns quickly.
Possible Loot - ‘Vision of Confluence’ Scout Rifle, ‘Corrective Measure’ Machine Gun, ‘Found Verdict’ Shotgun, Class Item Armor, Arms Armor
Encounter 3 - Oracles
This encounter will focus on destroying Vex Oracles, large cubes of light that will spawn around the arena. These Oracles will spawn in a certain order and must be killed in the same order. There are three spawns on the left of the arena, three spawns on the right, and one in the centre. Go ahead and assign callouts to these locations, some people prefer to use callout 1-7, while others prefer a R1-3 + L1-3 + Mid callout. Each Oracle spawn location is accompanied by a certain tone to help.
Have 2-3 members of your Fireteam sit themselves up high towards the middle of the arena to give themselves a nice vantage point of as many of the Oracle spawns as possible. These members will be your dedicated Oracle killers.
The other members of the Fireteam need to spread out across the arena and will be on simple add-clearing duty. Be sure to prioritise Minotaurs, as they can get dangerous real fast, and the Hobgoblins that will spawn on pillars on the outer areas of the arena.
Once the encounter fully begins three different Oracles will quickly spawn, play their tone, and then despawn in a certain order. As an example, using the 1-7 callouts, 2, 5 then 1 will spawn, play their tone and despawn in that order. This will then repeat another time before all seven Oracles spawn. The Fireteam will then need to kill Oracles 2,5 and 1 in that order to progress to the next phase.
The next phase has 4 different Oracles spawning, then the next phase has 5, all the way up to all 7 Oracles spawning. If the Fireteam guesses the wrong Oracle the team will wipe and be forced to restart the encounter.
The members on Oracle killing duty need to have high damage weapons like Xenophage and a Sniper in order to quickly kill Oracles. The members on add-clearing duty need to have exactly that, add-clearing weapons such as a Machine Gun, Shotgun, Grenade Launcher, as well as something long range in order to take out those pesky Hobgoblins.
Once the final phase where all seven Oracles need to be destroyed has been completed, the encounter will end and the loot chest will spawn.
Possible Loot - ‘Vision of Confluence’ Scout Rifle, ‘Found Verdict’ Shotgun, ‘Praedyth’s Revenge’ Sniper Rifle, Arms Armor, Leg Armor
Encounter 4 - Templar
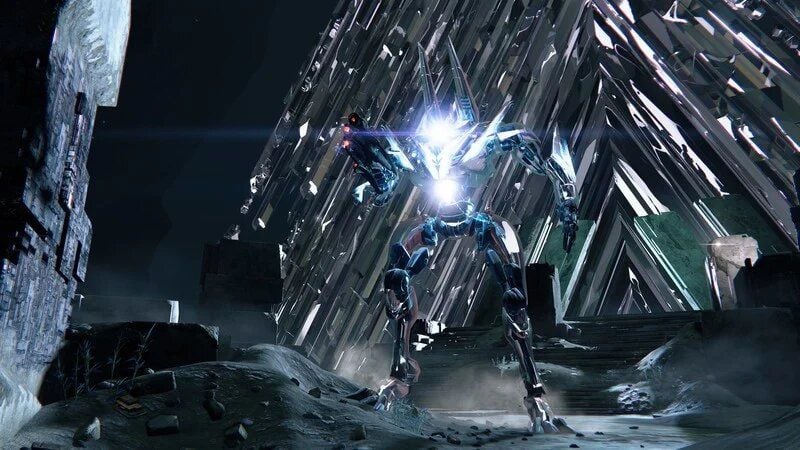
The Templar is the first proper boss within the Vault of Glass and is a tough enemy to crack.
In the centre of the arena where the cleansing pool of light was previously is now a floating Relic that can be picked up by a member of the Fireteam. Once this Relic has been picked up the encounter will begin with the Templar teleporting down in the centre of the arena.
The Relic is very important in this encounter as the person holding it is able to hold down the Fire button to bring up a large dome shield around themselves and allies. This shield will not only block damage but is also able to cleanse any ‘Marks of Negation’ from allies within the dome. The Relic also has its own Super that fires a large ball of energy in a straight line, more on this in a minute.
Once the encounter begins the Fireteam will need to spread out and begin killing adds. Three Oracles will spawn and will need to be dealt with in the same way as the previous encounter. Once the Oracles have been destroyed the whole Fireteam will need to group up in a location with a good line of sight of wherever the Templar is currently sitting. The Relic holder will then activate their Super and fire the ball of energy right at the Templar, bringing down its Immunity shield. This will begin the DPS phase of the boss encounter and players will need to pour as much damage into the Templar as they possibly can.
While the DPS phase is underway the Templar will attempt to ‘Detain’ several members of the Fireteam which will surround them in a small bubble of Vex energy and they will be unable to shoot this bubble. Players who are not detained will need to fire at these Vex bubbles to destroy them and free their teammates.
After a short while the Templar will teleport away to a new location and the DPS phase will end. From here the Fireteam will split up again, kill adds, destroy Oracles and repeat the DPS phase. This is the main loop of the encounter.
However, there is a way to stop the Templar from teleporting away in order to extend the duration of the DPS phase. When the Templar is about to teleport, a small beam of light surrounded by a small ring will appear somewhere in the area, showing where the Templar will teleport. If a member of the Fireteam is standing at this location when the Templar attempts to teleport, the teleport will be cancelled. It is best that the Relic holder be the dedicated ‘teleport-canceller’ as they are able to stand out in the open and block damage with the Relic. Be careful though as each time a teleport is cancelled several Vex Minotaurs will spawn and begin rushing to the player’s position. Oracles will also continue to spawn during the DPS phase if you extend it too long which adds to the difficulty.
Once the Templar has been destroyed the encounter will end and the loot chest will spawn.
Possible Loot - ‘Vision of Confluence’ Scout Rifle, ‘Corrective Measure’ Machine Gun, ‘Fatebringer’ Hand Cannon, Arms Armor, Chest Armor.
Encounter 5 - Gorgon’s Labyrinth
After the Templar has been killed the large door towards the front of the arena will open and the Fireteam will finally be able to leave into a new location. This new location is the Gorgon’s Labyrinth.
This is a very interesting encounter as it plays like a stealth mission. This area is a maze of caves and pathways that are inhabited by special Vex Harpies known as Gorgons. These Gorgons will patrol across set paths and if you shoot at them or they spot you, the entire team will be given the ‘Gorgon’s Gaze’ debuff and will automatically wipe a few seconds later.
Be sure to study the set pathways of the Gorgons as this will give you a much better chance at success. If you are crouching and walking slowing they are less likely to detect you so be sure to avoid sprinting or double jumping.
The basic pathway is to follow the large left pathway and use the large rocks in the middle of this path as cover. Once the path is clear of Gorgons, run to the large ramp-like rock in the centre and get on top of this. Follow these rock platforms forward as up this high you are out of the detection radius of the Gorgons. Once you reach the last rock platform, look right, jump down and run across the pathway into a small cave system that will lead you out of the maze.
Secret Chest 2
Within the Gorgon’s Labyrinth are three floating Vex boxes that can be destroyed with gunfire. Destroying all three boxes will cause a special door in the Labyrinth to open. From the starting position of this encounter head into the cave along the right side and hug the right wall. Here you will soon find the secret chest.
Secret Chest 3
Follow this path and you will eventually find yourself facing a massive chasm with several platforms spawning and despawning in the middle. TIme your jumps to make your way across the chasm to land on a narrow ledge further down. Run across this platform to the left and you will eventually find yourself in front of a large door. When facing the door there is a chest on a ledge to the upper left. Jump up on the platforms near the ledge to make your way up.
Encounter 6 - Gatekeepers
Upon entering the next room you will find yourself in the centre of the room between two platforms to the right and left, each having a portal and vex plate on them. Standing on these plates, or on the platform in the middle of them, will capture the plate and activate the portal near it. The right portal takes the player to a lush, jungle area which players gave the callout ‘Venus’ back in Destiny 1, and the left portal takes the player to a desert area which players gave the callout ‘Mars’.
At the start of the encounter a special Hydra called a ‘Gatekeeper’ will spawn towards the front of the area along with several enemies. Killing this Gatekeeper will drop another Relic that players will be able to use.
Once the portals have been activated, send one player through each of them where they will need to defend a Conflux against enemies spawning at the top of the stairs. The players outside will need to defend the plates from enemies in order to keep the portals activated. Eventually, a special Minotaur will spawn inside one of the portals with an Immunity shield like the Templar which the player inside will need to call out. The player holding the Relic will need to enter that portal and fire the Super at the Minotaur to kill it.
Now this next part is what makes this encounter fairly difficult. Whenever a player holding the Relic goes through a portal they will be given a debuff that lasts 45 seconds called ‘Teleport Destabilized’. Anyone with this debuff is unable to go through any portals until this debuff has cleared.
So here's how the encounter will go:
- Players stand on plates and activate portals
- Gatekeeper in centre is killed and Relic is taken by a player
- One player heads into Venus portal, one player heads into Mars portal and they both begin defending the Confluxes.
- While the above is happening, the other players are defending the outside plates from enemies.
- A Minotaur spawns in Venus portal, the player calls it out, and the Relic holder then heads into the Venus portal to kill it.
- The Minotaur in Venus has been killed but the Relic holder cant leave as they have the ‘Teleport Destabilized’ debuff from entering the Venus portal. The Relic holder drops the Relic, the player who was originally defending the Conflux takes the Relic and becomes the new Relic holder while the previous Relic holder stays to defend the Conflux.
- The new Relic holder heads outside into the main room to help defend the plates until the spawning of a new Minotaur inside the portals is called out.
- A Minotaur has spawned in the Mars portal and the player inside calls it out. The Relic holder still has the debuff from exiting Venus previously so they must drop the Relic, a nearby player defending the plates picks it up and heads into the Mars portal to take care of the Minotaur. The player who just dropped the Relic, takes that previous player's position in defending the plates.
While this is all happening Gatekeepers will continue to spawn outside the portals who will disable the portals until they are killed. Overload Minotaurs will also spawn outside the portals so be sure you have the relevant mods to take care of them.
Once enough Minotaurs have been killed inside the portals the two Confluxes will disappear and a new one will spawn outside in the centre of the arena in the same spot you killed the first Gatekeeper. From here the entire Fireteam will need to defend this new Conflux with the Relic holder being sure to prioritise the Immunity Minotaurs which will spawn at the top of the stairs.
After you have defended this Conflux for a couple of minutes the encounter will end and the loot chest will spawn.
Possible Loot - ‘Fatebringer’ Hand Cannon, ‘Found Verdict’ Shotgun, ‘Hezen Vengeance’ Rocket Launcher, Legs Armor, Helmet Armor
Final Encounter - Atheon, Time’s Conflux
The encounter will start with Atheon spawning into the centre of the arena with players needing to avoid his attacks while taking care of the multitude of Harpies that spawn. After a short while, three random members of the Fireteam will be automatically teleported into either the left Mars portal, or the right Venus portal. Players will need to call out which area they are in so that the players outside can rush over to that plate in order to activate the right portal.
Players who were teleported inside one of the areas will constantly find themselves with the debuff ‘Marked by the Void’. This debuff will slowly cause the player's vision to darken from the edges until they are unable to see and are eventually killed. The only way to cleanse this debuff is by picking up the Relic inside the portal and using its dome shield. This is only a temporary fix though as soon as the dome shield drops the debuff will be re-applied.
The three players inside the portal will need to destroy three Oracles that will spawn up high within the area. Now this is where it can become complicated as these Oracles all spawn at the same time but need to be destroyed within a certain order. This order is seen by the players outside the portals as they will see Oracles will flash in the same position as inside the portal. Players outside will need to call out to the players inside the portal what order the Oracles spawned in so that they can be destroyed correctly.
The ‘Mars’ and ‘Venus’ portals are the exact same areas as the main outside area, just in different time periods. The players teleported inside the portal are placed at the top of the main stairs while the players on the outside are at the bottom. As these two teams are basically facing each other this can make the Oracle callouts difficult as an outside player's right is the inside player's left.
A popular strategy to overcome this is to have the team teleported inside to take the Relic, quickly kill the enemies inside, then jump forward across the platform and turn around to then be facing the same direction as the team members outside the portal. This makes Oracle spawn callouts a lot easier as you can then simply say ‘Mid, left, right’ for the order and everyone's orientation is the same.
Once these three sets of these three Oracles have been destroyed the entire Fireteam will be given the ‘Time’s Vengeance’ buff that lasts for 30 seconds. This gives a huge boost to Weapon and Super damage as well as Super regeneration. The inside team is then free to leave the portal back out into the main area where the boss DPS will begin.
Once all Fireteam members are together jump to the platform in the centre of the area. Place a Well of Radiance or a Titan Bubble to give the huge damage buff and go to town on Athean, dealing as much damage as you can within the limited time window.
High damage Supers like Chaos Reach, Nova Bomb, Thundercrash work great here for DPS. Weapons like Anarchy paired with a Sniper are also great as well as Grenade Launchers and Rocket Launchers.
During this DPS phase, Atheon will select one member of the Fireteam to be Detained, similar to the Templar encounter. This player will receive the ‘Detainment Imminent’ text on the left of their screen and they must jump away from the rest of the Fireteam so that the whole team isn't Detained along with them. Once they are Detained, the other members of the Fireteam can shoot the bubble to free them.
A lot of Harpy ‘Supplicants’ will spawn during this DPS phase that explode when close enough to players. While standing on the centre platform you are safe from these Supplicants but watch out for them once the DPS phase ends and you need to jump pack over to the plates and portals.
This then puts the encounter at the start again and the Fireteam must repeat the above steps until Atheon has been defeated.
Possible Loot - ‘Praedyth’s Revenge’ Sniper Rifle, ‘Corrective Measure’ Machine Gun, ‘Hezen Vengeance’ Rocket Launcher, Helmet Armor, Chest Armor, ‘Vex Mythoclast’ Exotic Fusion Rifle.
,fit(cover),quality(80)/https%3A%2F%2Fcms.tracker.gg%2Fcontent%2Fimages%2F2025%2F07%2Fgeneral-dungeon-race_16x9--2-.png/image.jpg)
,fit(cover),quality(80)/https%3A%2F%2Ftrackercdn.com%2Fghost%2Fimages%2F2024%2F4%2F151242_IMG_0244.jpeg/image.jpg)
,fit(cover),quality(80)/https%3A%2F%2Ftrackercdn.com%2Fghost%2Fimages%2F2024%2F1%2F11129_IMG_1548.jpeg/image.jpg)
,fit(cover),quality(80)/https%3A%2F%2Ftrackercdn.com%2Fghost%2Fimages%2F2023%2F12%2F15243_2023_Warlord_s_Ruin_Dungeon_Press_Kit_Dungeon_COMPRESSED_005.jpg/image.jpg)
,fit(cover),quality(80)/https%3A%2F%2Ftrackercdn.com%2Fghost%2Fimages%2F2023%2F10%2F41948_EN_Bungie_TheFinalShape_S3_2560x1440_2560x1440-9bdaae3a03394737c6fddecd62f00a70.jpg/image.jpg)
